← Go Back to the Impact Challenge Table of Contents
Over the past few weeks, you’ve set up profiles on a variety of academic social networking platforms. This week you’re going to create the hub that will bring them all together: your own academic website.
You might already have an OU departmental website showcasing basic contact information about you, but it might be doing your research a disservice.
Because of their rigid formatting and style requirements, you often can’t link out to your full-text publications, showcase scholarship that’s not shaped like an article, or add the number of articles and other scholarly products that best explain your career. And the other important things you do – teaching, mentoring, service, and so on? You often can’t share them at all.
This week we’re going to help you create a flexible website that will easily bring together all of your activities and facets. You’ll learn how to embed and automate content so you don’t have to constantly update your website and we’ll get you started with a recommendation for a website platform that offers solid search engine optimization to – you guessed it – increase your “Googleability.”
Choosing a hosting solution
You’re in luck when it comes to a website host! The University of Oklahoma offers a free hosting solution called OU Create. Managed by OU’s Office of Digital Learning, OU Create offers students, faculty, and staff the opportunity to build and maintain a digital identity by facilitating the registration of web domains (.com, .org, .net) and easy installation of popular open-source applications such as WordPress, MediaWiki, Drupal, and Omeka. In providing you with access to these tools, Create empowers all members of the OU community to craft and control their digital narrative through the use of blogs (which we’ll cover in next week’s OU Impact Challenge), portfolios, wikis, and more.
To get started with OU Create, go to create.ou.edu and click on the big blue “Get started” button. From there, enter your OUnetID and the same credentials you use to access your email or any other OU system. If you are off campus, you will be asked to confirm your identity with two-factor authentication. You can find more information about this process on the OU IT department website. 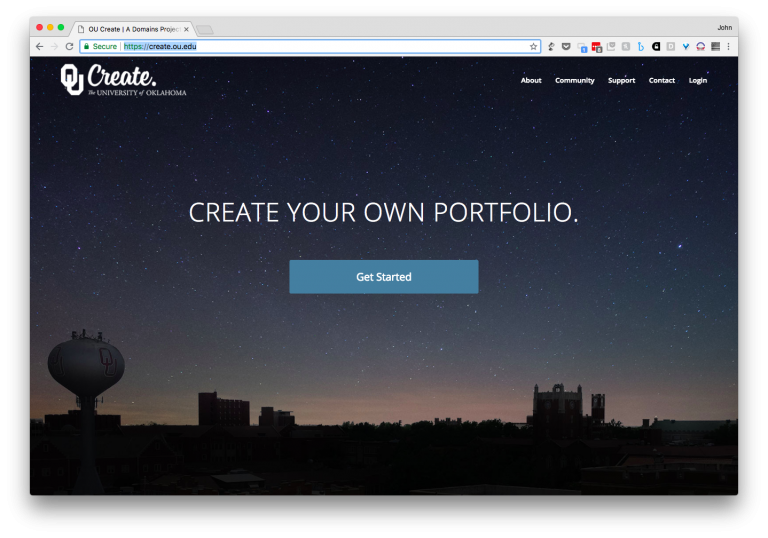 If this is the first time you have logged in to OU Create, you will be prompted to pick a domain. Most users choose the free .oucreate.com subdomain and register a url with their name in it, which would look like:
- http://firstNamelastName.oucreate.com
- http://johnstewart.oucreate.com
- http://janedoe.oucreate.com
Alternatively, you can choose a top-level domain. These cost $12 per year; you choose between a .com, .org, or .net. These would look like:
- http://firstNamelastName.net
- http://johnastewart.com
- http://janedoe.org
Once you have registered a domain and gone through the payment (if applicable) and terms of service screens, you will see the control panel for your domain. 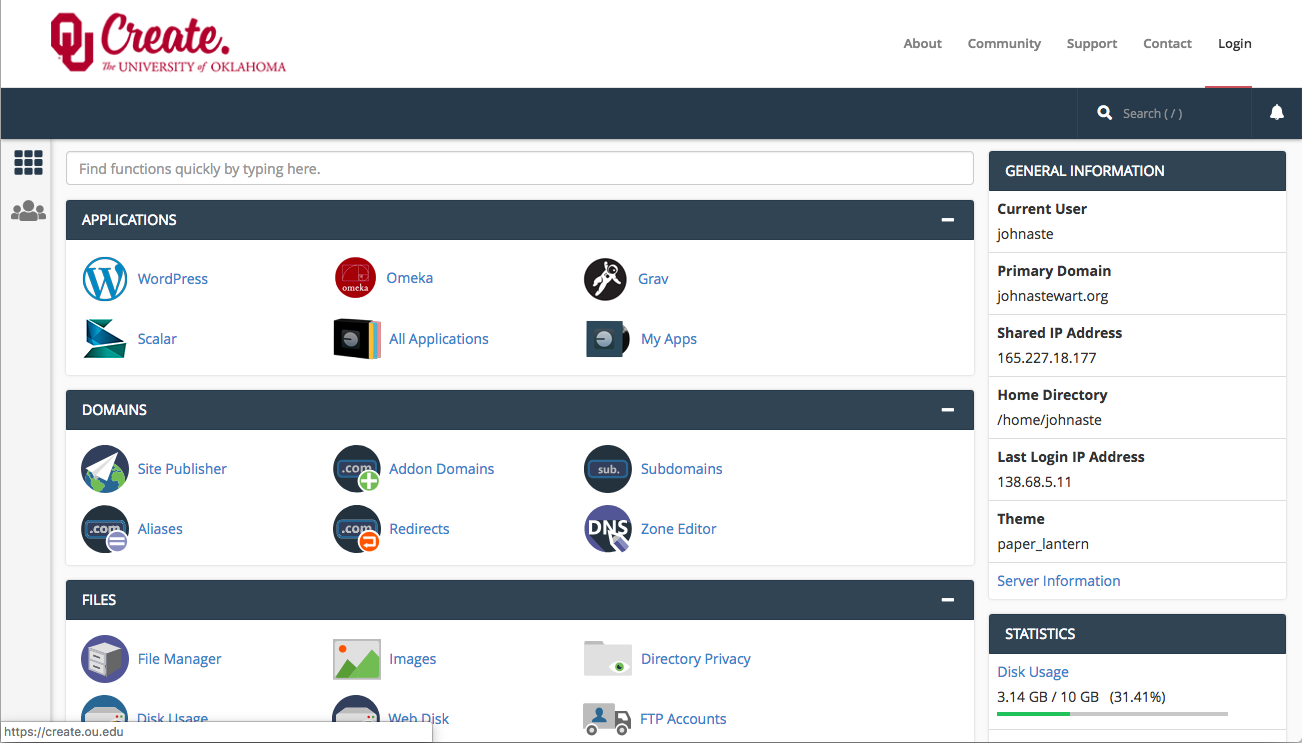
There are lots of options represented by different icons. Today, we want to keep it simple, so click on the WordPress icon to start installing that application for your site. After clicking on the WordPress icon, click on “install this application”. 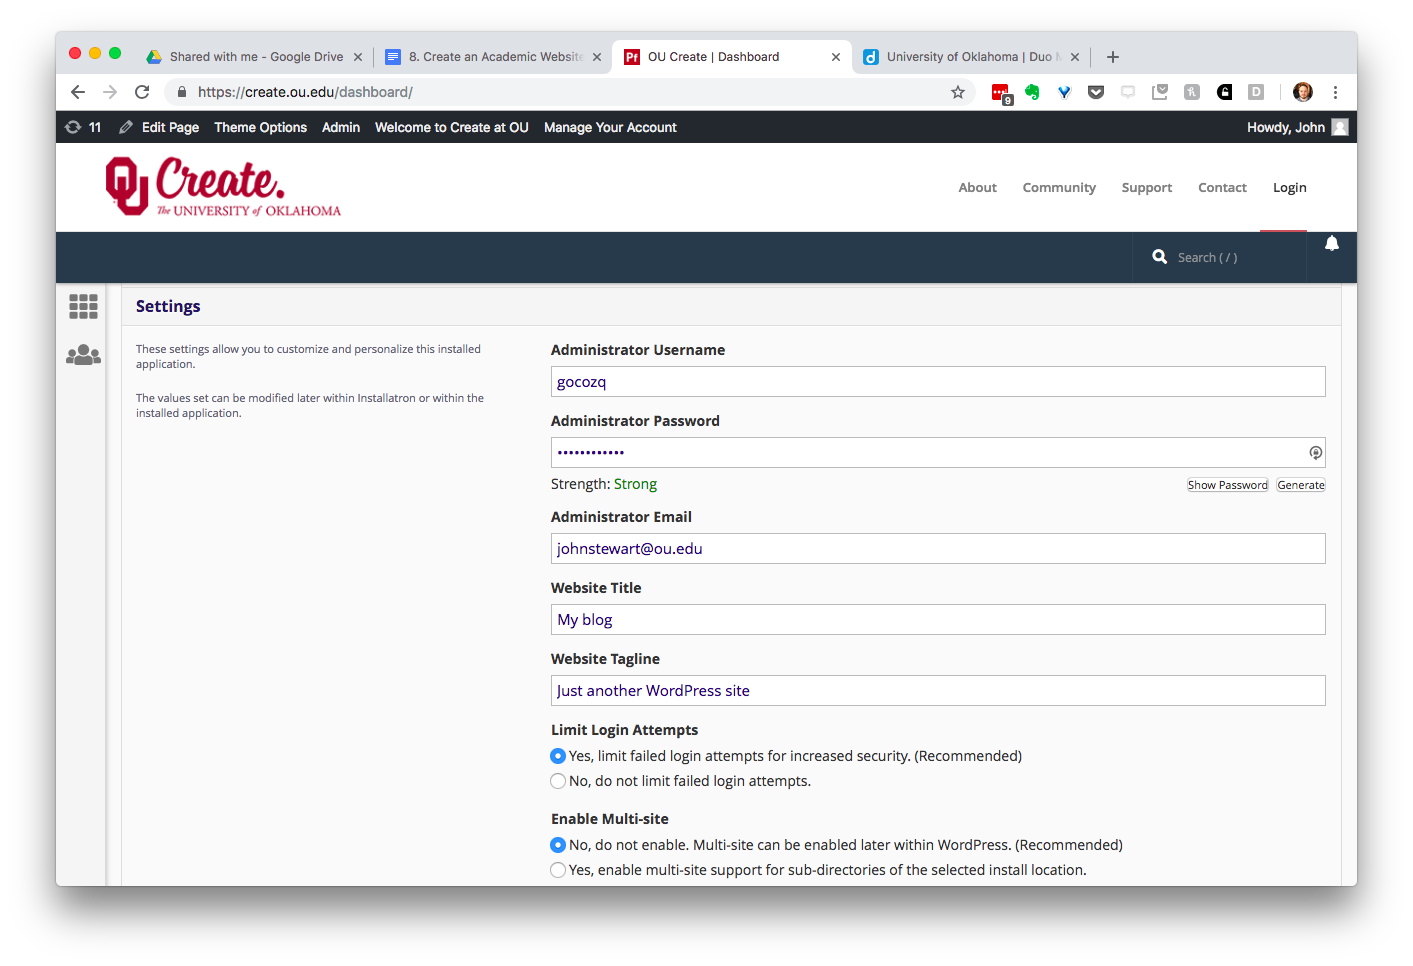 Here, you can choose the administrative username and password for your site and set the title of your site. Because this is an academic website, we suggest using your name as the title and your academic position as the tagline.
Do some “market research”
Now that you’ve started your website, your next job is to learn what makes an academic website great. Search for others in your discipline, academics in other fields, and even professionals who work outside of the Ivory Tower. The point is to find sites that you want to emulate for both design and content, make some mental notes about what makes them “work,” and maybe even bookmark them for future reference.
We recommend checking out these OU faculty member sites for inspiration:
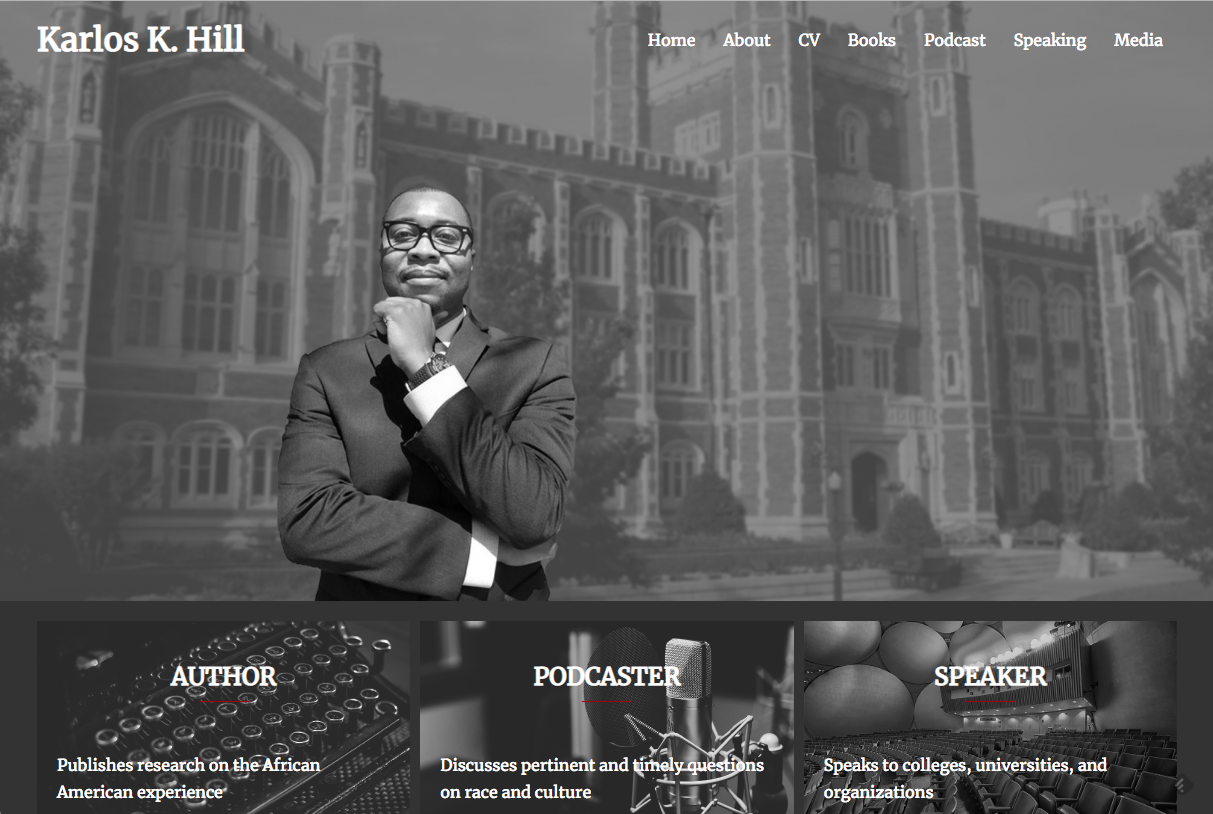
- Angela Person: Angela is the Director of Research Initiatives and Strategic Planning, PhD Program Coordinator, and a Lecturer in the Christopher C. Gibbs College of Architecture at OU. Her website is both visually appealing (great use of icons, photos, and white space) and prominently includes important information about her research, teaching, and administrative work. The second menu at the top of the page also provides easy access to her CV and a contact email.
- Charles Nicholson: Charles is an Assistant Professor in OU’s School of Industrial and Systems Engineering. His website is a great example of how many professors in STEM incorporate their research labs into their websites. The Analytics Lab website features news about the work of both Dr. Nicholson and his graduate students. You can find information about the research grants that Dr. Nicholson has earned and the courses that he’s teaching. The menu structure and use of images make it easier to visually process the information within the site.
- Daniel Hicks: Daniel is an Associate Professor and the Director of Graduate Studies in OU’s Department of Economics. His website demonstrates that you don’t have to use WordPress. If you prefer to use DreamWeaver or other HTML editors, you can still build and upload a beautiful site into OU Create. Daniel’s site features slick javaScript powered rotating icons. Underneath this flashy interface, you find a clean set of pages and a particularly well built page for publications.
Got a sense of what a solid academic website looks like? Good, now let’s move on to what you will want to include in yours.
Essential components of a great academic website
As we’ve seen from Angela’s example, design is just one aspect of your website. Before we worry about the aesthetics, let’s dig into the key types of content that are most important. It will be easier to style your site when you have some actual content to style.
A short bio and recent photograph
Use your bio to give visitors a quick, readable overview about you and your work. Don’t use your bio to recount your entire career – that’s what your CV is for. Instead, be sure to state the most important thing about yourself first and foremost, and fill in the rest with broad strokes.
Who are you and what makes you tick as a scholar? What have your most important accomplishments been to date? Write a paragraph or two, and then take a knife to it, cutting it down to bare essentials. Here are eleven tips on writing good bios.
Remember what we learned in Week 5 / Chapter 5 about good professional photos? Apply those guidelines to help you choose a good photograph for your website.
Once you’ve got your bio and your photo ready to go, add them to your “About” page. WordPress will have already installed an About page with placeholder text. Once you’ve replaced that default text with your bio, click update.
Next, let’s make your “About” page the first thing that people see when they get to your site. Go to the Reading sub menu under Settings as pictured below. Rather than displaying blog posts on the homepage of your site, tick the radio button next to Static Page and then select “About” from the drop down menu for the homepage. WordPress is no longer a blog but rather a set of pages about you. 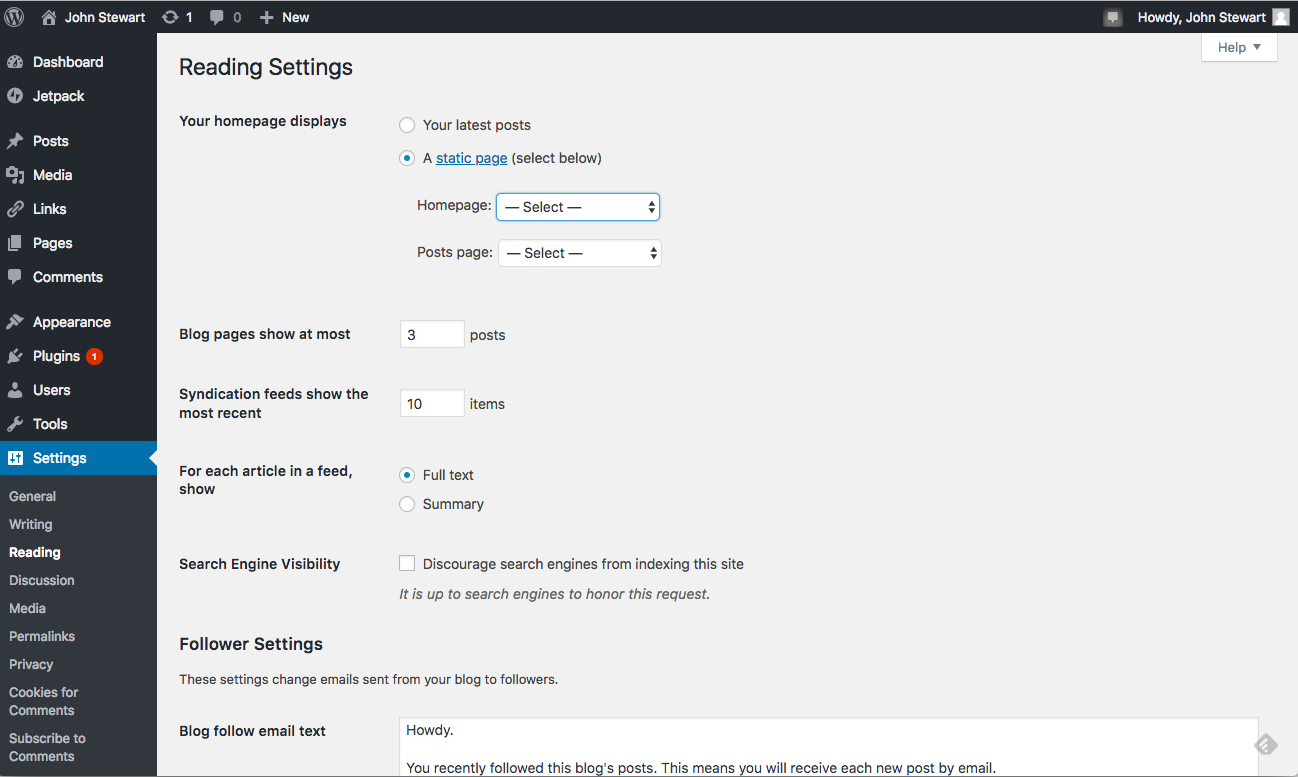
Research interests
Now you’re going to tell others about your research. Your Research Interests page should be a punchier version of your Research Statement. If you’ve applied for a job or a promotion in the past few years, you likely have one handy.
The purpose of this section is to get others interested in your research, and help them understand how you’ve contributed to your discipline. You’ll describe what you’ve accomplished to date and what problems you’re currently working on.
Keep in mind that the Research Interests page should be much shorter than a formal Research Statement – no more than 2-3 paragraphs. Any longer and you risk losing your readers. Some jargon is acceptable in this section, but don’t go overboard – write as though you’re explaining your work to another academic who’s not in your discipline.
You might also choose to summarize some projects that you’ve most recently worked on (or for which you’re particularly well known) on this page. A paragraph or two per project is all that’s needed. Alternatively, you can break these descriptions out into a standalone Projects page.
Teaching & pedagogical materials
If you’re currently teaching or have taught in the past and want to highlight that experience, a Teaching page is the place to do it. List the courses you’ve taught, when you taught them, and include syllabi and any class materials here.
Similarly, if you want to highlight your mentoring activities or service to your field in their own standalone pages, you can do that too.
Contact information
If others are interested in your work, how can they best reach you? Include both your current university contact information on this page and – most importantly – an email address that won’t easily go out of date if you switch institutions (your personal email address will work, if you’re comfortable listing it).
And because this is the 21st century–and you’re quickly becoming a very connected scholar–this is a good place to list links to your other profiles from across the web. You can do this now, and it’s also part of your homework below.
Your CV
The only thing more annoying than keeping your CV up-to-date is remembering to upload it to your website after you’ve changed it.
We’re going to share with you a super-efficient hack that made updating a CV downright pleasurable: embedding your CV in your website using Dropbox, so any changes you make automatically appear online.
- If you don’t already have a Dropbox account, sign up for one here for free.
- In Dropbox, copy a Word version of your CV into the “Public” folder. Make sure your CV is up-to-date, and then save it as a PDF.
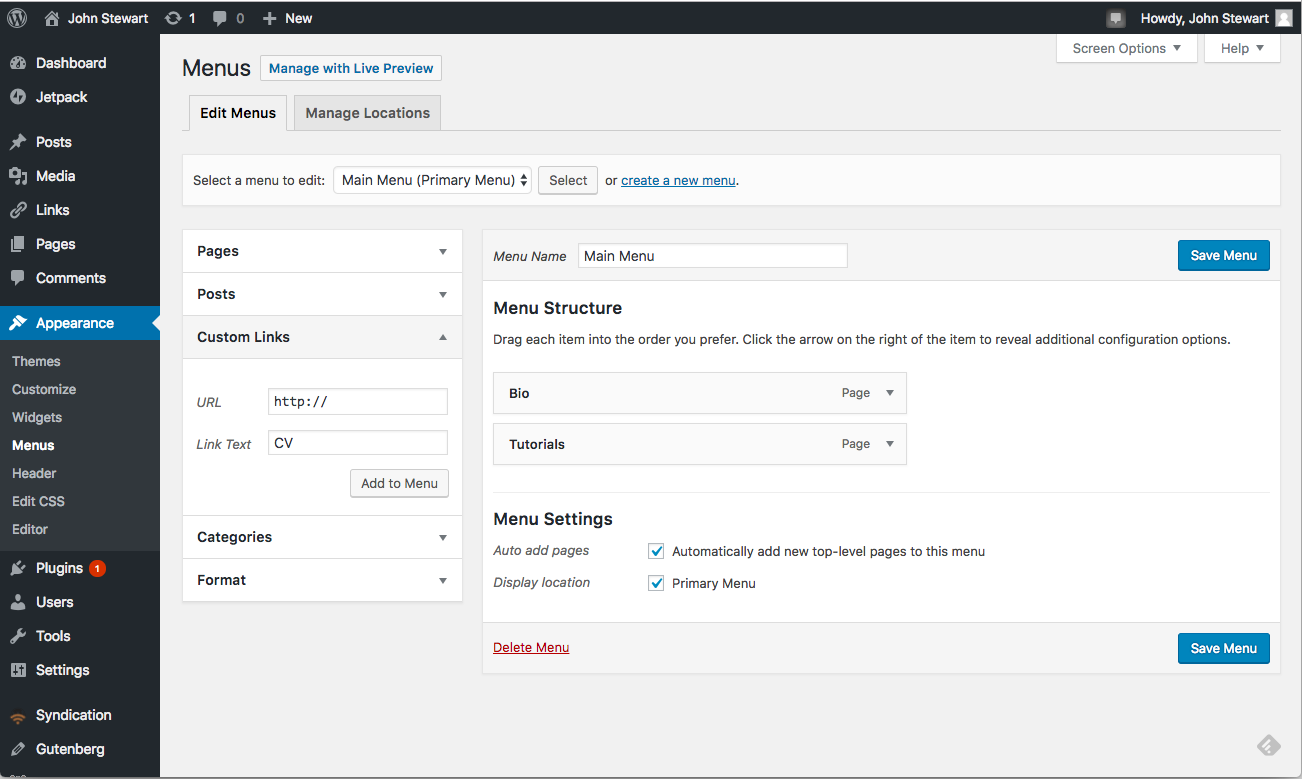
- On your website, go to the menus control panel. In WordPress, you will find your menu controls under Appearance>Menus. There you can create a menu. Call it something like “Main Menu.” Then add all of the pages you’ve created to the menu by ticking the boxes next to each page and clicking add to menu. Also make sure that the box for Primary Menu is ticked so that your menu is displayed on your home page.
- Next, add a Custom Link to your CV. Underneath pages and posts, there’s a third area for custom links. There you can add links to any url you’d like and tell WordPress what the text should be for that link in your menu.
The URL for your CV will look something like:
”https://dl.dropboxusercontent.com/u//[CV FILENAME].pdf”
You can find the URL for your file by right-clicking on your CV while in Dropbox and selecting “Copy Public Link.” When all is said and done, you’ll have a link to your CV in your website that looks like this:
And the best part is, whenever you need to update your CV, you can just update the Word file that’s in your Public Dropbox folder, re-save it (using the same filename) as a PDF, and the updated version will automatically appear on your website!
Your scholarship
Now that others have a sense of all the scholarly products you’ve ever created thanks to your CV, it’s time to get others access to your most important works.
On this page, you’ll list your publications, talks, data, software, and any other scholarly products that you want to highlight. The purpose of this page isn’t to replicate what’s on your CV; it’s so your website’s visitors can get a 50,000-foot view of your quality as a scholar.
There are two popular ways to create pages for your scholarship: put everything you’ve ever created onto a page; or highlight only your best or most recent work. We’re going to take the latter approach, because it’s easier to maintain over time.
Copy your best scholarly works from your CV to this page. Include the full citation and a link to the resource itself, like so: 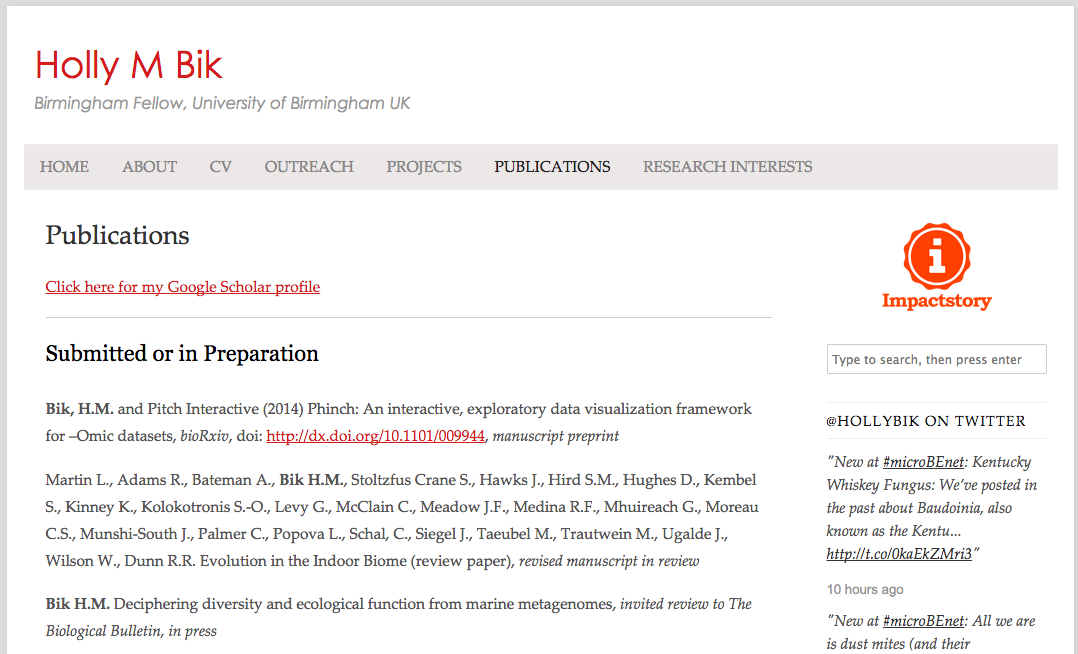
Make it easy on your website visitors by listing no more than 20 products total.
Themes
Now that you have several pages in your website, let’s give your site some style. In WordPress, themes determine how your site looks. They tell the site which fonts to use, what colors to use, and how to lay out your pages.
Choosing a theme is hard because there are so many – at least 20,000! You can find the themes that WP has approved and certified by going to “Appearance” and clicking “Add New” next to the word “Themes.” 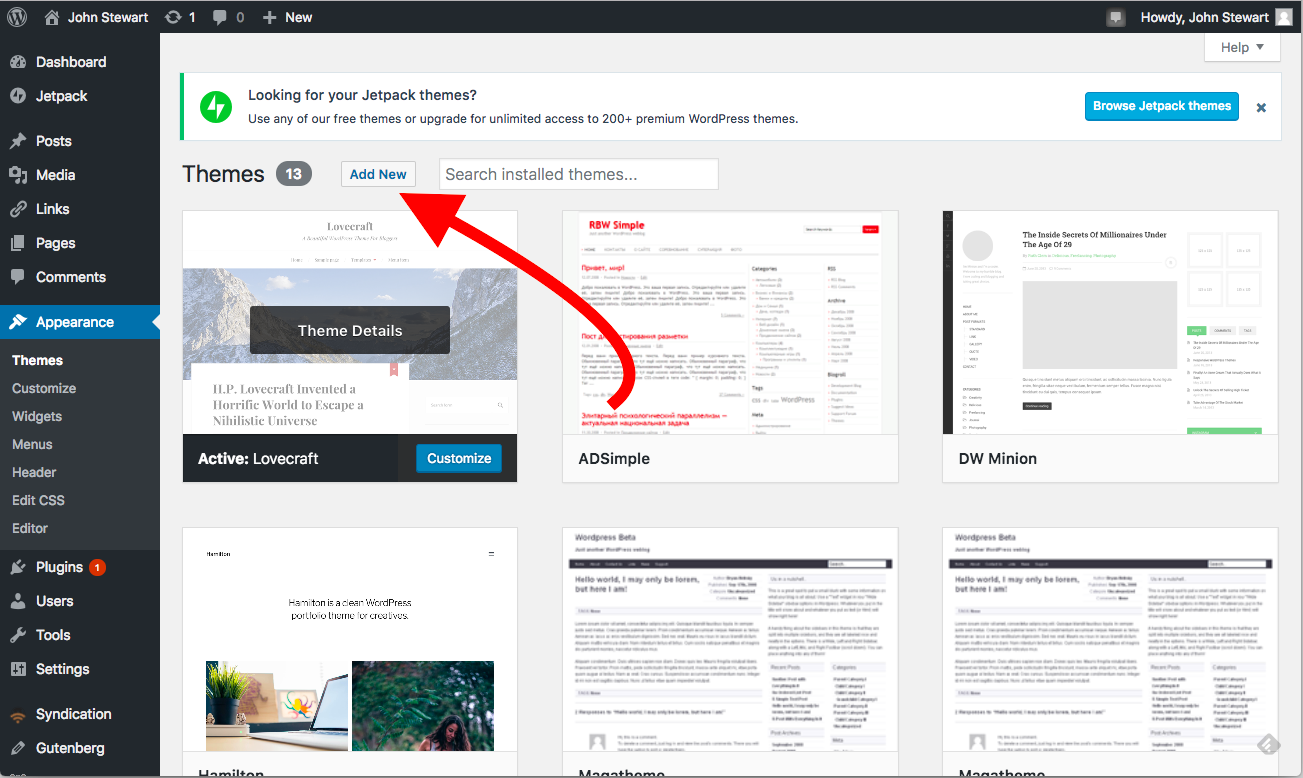
The key things to think about when choosing a theme are the number of columns you want and how images are used. If you just want a single column of text with lots of white space around it, ignore all the two and three column themes. If you want a right or left hand navigation menu, make sure to choose one of the two column themes. If you have a beautiful image that would make a great header for each page, look for themes that allow you to display the featured image for each page. If you want your site to be more focused on your text, look for themes that minimize images.
If you’ve seen a website you really like, you might look at the bottom of that site to see what theme they’re using. We looked at Angela Person’s site earlier. At the bottom of her site, at the right of her footer, it says that she’s using the Fashionista theme. You can add install and activate this theme for your website to get a similar look. Angela made good use of the menus and widgets in her theme. For more information about choosing and configuring your theme, we suggest watching this YouTube video.
In general, YouTube has thousands of videos on setting up and configuring WordPress. OU also provides you with a subscription to Lynda.com which has full online courses on using WordPress.
Homework
First of all, take a deep breath. You have a website and that’s no small feat! Way to go!
Now let’s add links to the profiles you may have created so far (ORCiD, GoogleScholar, Twitter, LinkedIn, Academia.edu, ResearchGate, Mendeley, and Zotero). Whew!
You might also add Google Analytics or JetPack to your site, so you can tell how often your site is visited and by what demographics. We’ll spend time on this during the next semester of the OU Impact Challenge so you can come back to it later if you’d like.
Finally, take some time to experiment. The beauty of owning your own website is the freedom it offers. We recommend playing around with automating updates to your website. One way is to embed an RSS feed for your blog or Twitter stream. You could also embed a calendar that easily lets others know when you’re available during work hours (hopefully freeing you of scheduling agony in the future). Google, Outlook, and third-party app UpTo calendars are good candidates for that.
Success!
Big congratulations! This was probably the most challenging (and time consuming) activity in the OU Impact Challenge so far. Even though none of it is particularly hard, we do know it takes time. But now that you’ve got a website, we’re going to get you a blog to go with it. It’s an indispensable tool for building expertise and recognition in your field. We’ll see you next week with the blog challenge!
Content for the OU Impact Challenge has been derived from “The 30-Day Impact Challenge” by Stacy Konkiel © ImpactStory and used here under a CC BY 4.0 International License.
The OU Impact Challenge is licensed CC BY 4.0, unless otherwise noted.